Documentation - Zenbu for Craft 2
Installation
- Unzip the package
- Upload the /zenbu folder and its contents to your /craft/plugins folder.
- In the Craft CP, go to Plugins and click Install.
Usage
Main Section (Entry Listing)
Zenbu's main section is accessible from the Zenbu tab in the Craft Control Panel.
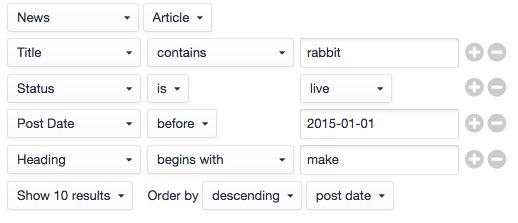
Entry filtering: Entries can be filtered using the various dropdowns. By default all entries from all sections are displayed. You can select a section and entry type to filter entries by that section/entry type. For further filtering, click the "+" or "-" button to add or remove a seach filter, respectively. When entries are filtered by a section/entry type, additional entry data columns specific to the selected channel are displayed. Entries can be filtered by section, status, author, category, number of entries displayed by page, etc.

Displayed Entry data longer than screen: Some entries have a lot of data, and the results table in Zenbu may be longer than the Control Panel width. In those cases, scroll the results table to the right to see the remaining columns. Alternatively, turn off the display of some columns from the Display settings section.
Saved Searches
Searches made in Zenbu can be saved for later re-use. This is useful for quickly retrieving complex search results or keeping track of your entries.
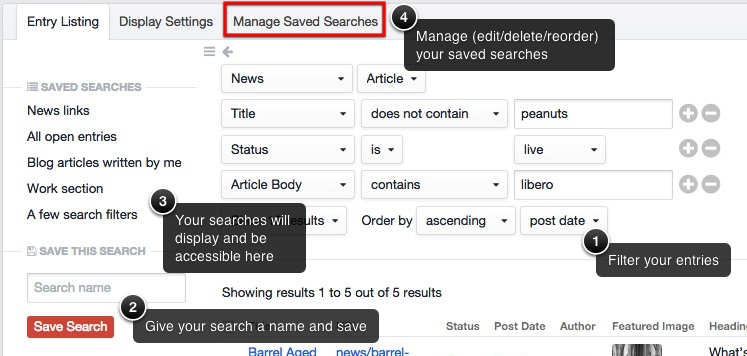
After completing a Zenbu search, save the search by giving it a name and clicking Save this Search button in the sidebar. The search will then be available in the "Saved Searches" section in the sidebar.

Saved Search Manager
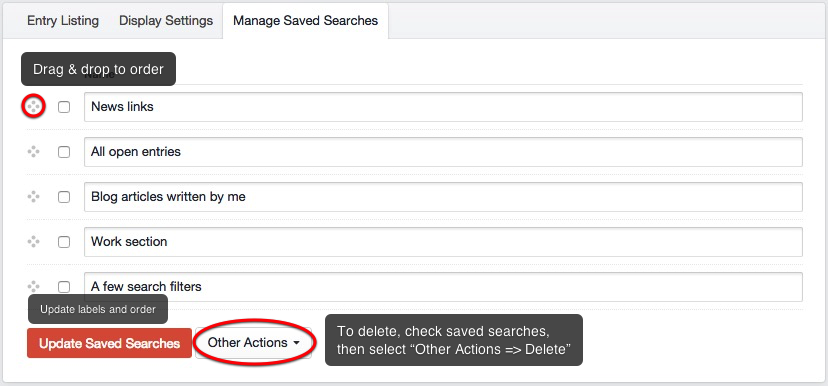
Clicking the Manage Saved Searches tab in Zenbu will send you to a listing of your saved searches, which you can manage.

- To change the label of a search, change its label in the list. Click Update to save the changes.
- To change the order of saved searches, drag the searches using the left-hand side handles in the desired order. Click Update to save the changes.
- To delete a search, select the checkboxes corresponding to the searches to delete, and select Delete under the "Other Actions" button. You will be prompted to confirm deletion.
Display settings
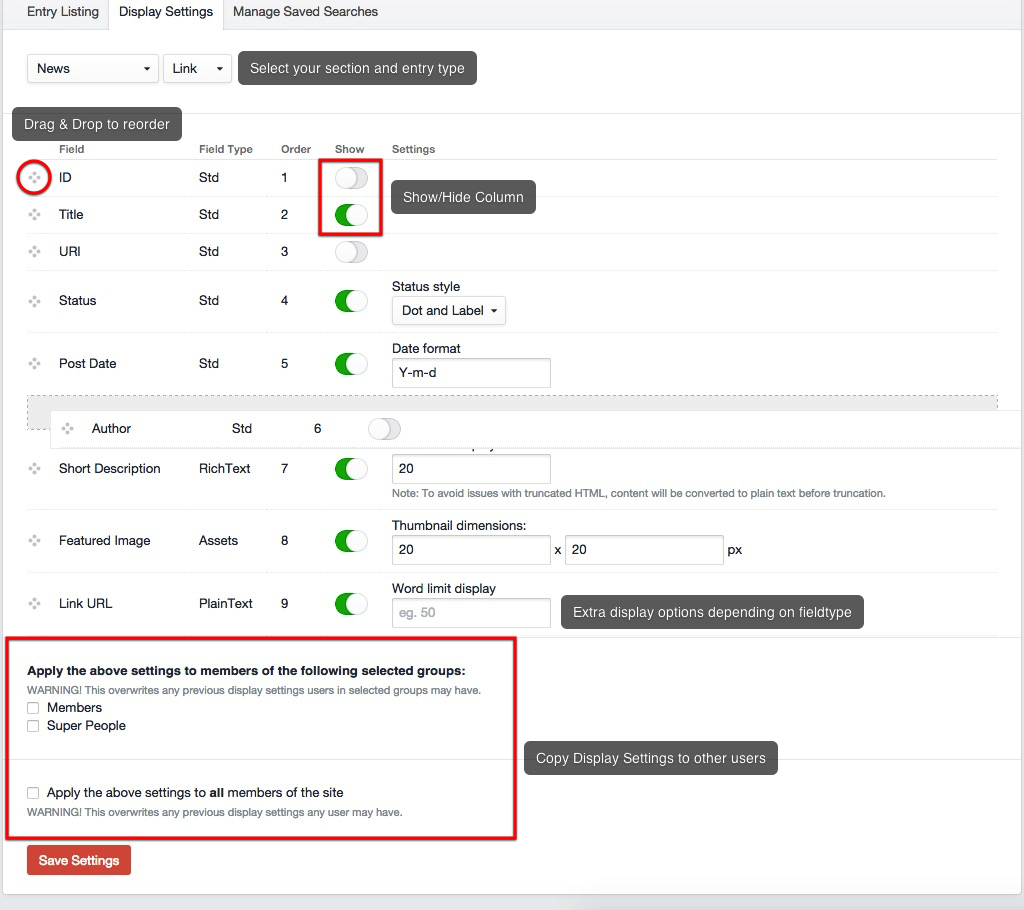
This section lets you control how entry data and custom fields are displayed in each section in Zenbu.

Showing/Hiding fields: Show fields by sliding the switch to the "on" position.
Changing the order of fields: To change the order in which columns will be displayed in Zenbu, simply shuffle the field order by dragging the table cells vertically using the left-side handles.
Extra options: Certain fields offer additional display options. For example:
- Word limit display: limit the number of words displayed in columns corresponding to input, textareas, and Rich Text fields.
- Date Format: Instead of the standard date formating, custom date formating can be used here, eg 'Y-m-d'.
- Show Matrix in Modal Window: instead of displaying the Matrix within the entry listing, you can set the Matrix to display in a modal window (popup) instead. Useful for saving space.