Documentation - Zenbu (for EE3)
Installation
- Unzip the zip file you have downloaded
- Copy the zenbu folder found at system/user/addons/zenbu into your system/user/addons/ folder
- Copy the zenbu folder found at themes/user/zenbu into your themes/user/ folder
- In the Control Panel, go to the Add-Ons Manager section and click the "install" link next to "Zenbu"
- You can access the add-on from the Add-On Manager by clicking the “Gear” icon, or initially if you're a Super Administrator, from the navigation “Edit” dropdown menu.
Update Instructions
- Unzip the update zip file you have downloaded.
- Copy the zenbu folder found at system/user/addons/zenbu into your system/user/addons/ folder, overwriting its contents.
- Copy the zenbu folder found at themes/user/zenbu into your themes/user/ folder, overwriting its contents.
- In the Control Panel, go to the Add-Ons Manager section and click the “Update” link next to Zenbu.
- The module list should then show the latest version of the add-on.
Usage
Note: This documenation is for Zenbu for EE2
Edit channel entries section
The Edit Channel Entries section is accessible from the Modules section or from the Control Panel's main navigation, under Content » Edit, for member groups that have this feature turned on.
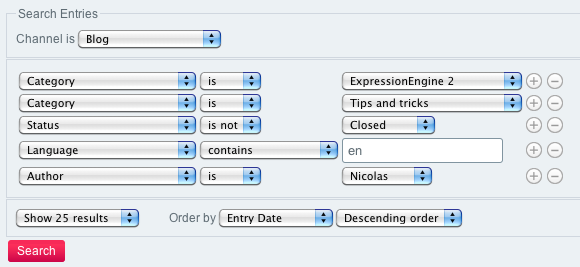
Entry filtering: Entries can be filtered using the various dropdowns in the "Search Entries" search form. Click the "+" button to add a filtering rule, and the "-" button to remove a filtering rule. Without any channel filtering, Zenbu displays entries from all channels with columns set up according to the "Multi-Channel Entry Listings" display settings. When filtering by channel, additional entry data columns specific to the selected channel are displayed. Entries can be filtered by channel, status, sticky state, author, category, number of entries displayed by page, etc.
Displayed Entry data longer than screen: Some entries have a lot of data, and the results table in Zenbu may be longer than the Control Panel width. In those cases, scroll the results table to the right to see the remaining columns. Alternatively, turn off the display of some columns from the Display settings section.
Saved Searches
Searches made in Zenbu can be saved for later re-use. This is useful for quickly retrieving complex search results, keeping track of your entries, or for exporting data using the Hokoku module.
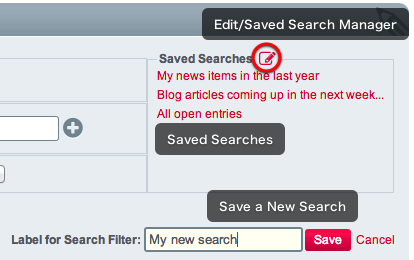
After completing a Zenbu search, save the search by clicking the Save this Search button. Give the search a name, and click the "Save" button. The search will then be available in the "Saved Searches" section.
Saved Search Manager
Clicking the Edit icon in Zenbu's "Saved Searches" section, you can manage saved searches.
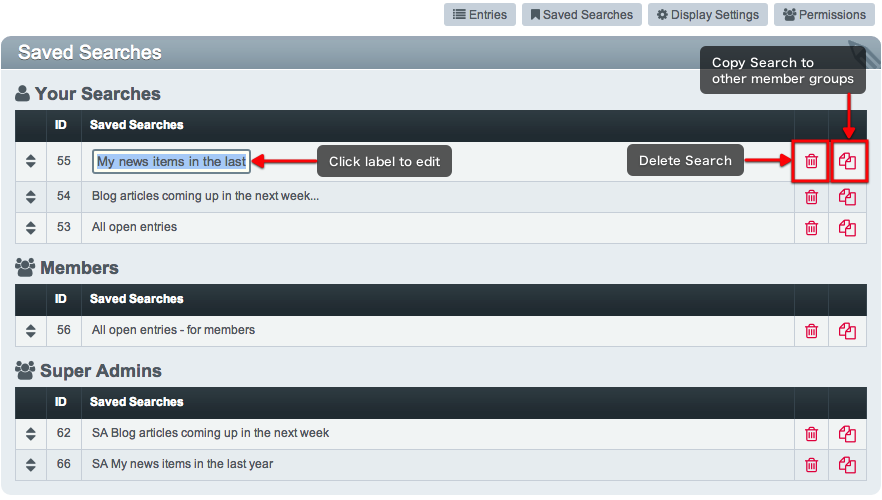
- To change the label of a search, clicks its label. Click outside of the input field to save.
- To change the order of saved searches, drag the searches using the left-hand side handles in the desired order.
- To delete a search, click the Delete link on the right
- To copy a search to member groups, click the Copy link on the right, and assign the member groups to which you want to copy the search.
Display settings
This section lets you control how entry data and custom fields are displayed in the Edit channel entries section.
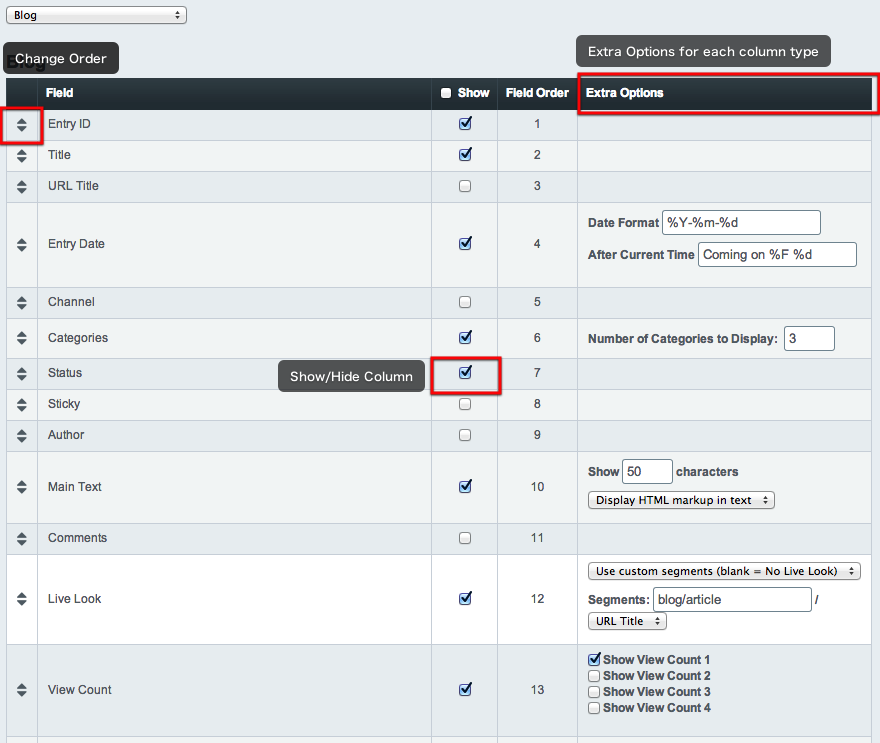
Showing/Hiding fields: Show fields by checking the checkbox in the "Show field" column for each field.
Changing the order of fields: To change the order in which columns will be displayed in the Edit channel entries panel, simply shuffle the field order by dragging the table cells vertically using the left-side handles.
Extra options: Certain fields offer additional display options. For example:
- Show X characters: limit the number of characters displayed in columns corresponding to input, textareas, and common wysiwyg-type fields.
- Date Format and After Current Time: Instead of the standard EE date formating, custom date formating can be used here. The "After Current Time" setting allows for additional custom date display when the entry date is in the future.
- Number of Categories to Display: Limits the number of categories displayed in the Zenbu column. Additional categories can be revealed by clicking the ellipsis "..." icon.
- Live Look settings: If Live Look settings are set for a channel, the Live Look link will point to this URL. Afternatively, a custom Live Look URL can be set here.
- Show matrix in row: instead of displaying a "Show matrix" link, which opens the Matrix data in a modal window, you can display data from Matrix fields directly in custom field column.
Quick access to each channel: The display settings are per channel, with the addition to settings for the general "Multi-Channel Entry Listings". Display Settings must be saved between switching channels (except for the "- All Channels -" section, which lists all channels. Users may have performance issues with this option, therefore it is last in the list). Tabs can be used to switch channels. However, after a certain number of channels, the display changes for a more manageable select field.
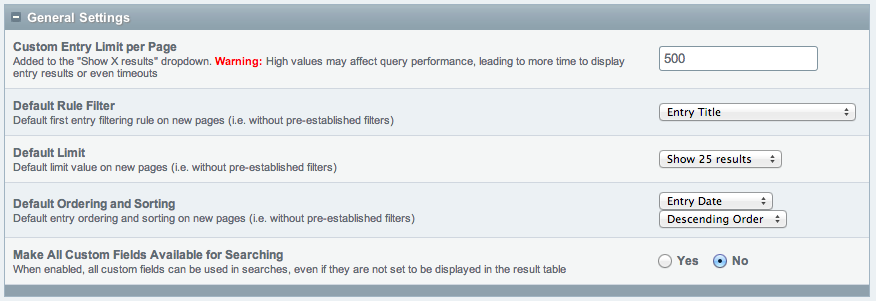
General Settings: In the Display Settings section, expand the "General Settings" tab to customize general areas of Zenbu, such as the default entry filter when loading Zenbu, the default sort setting, limit, etc.
Permissions
This powerful section lets you enable or disable access features for your own or other member groups, as well as grant or not access to the Zenbu module for specific member groups. You can access this section from the top-right Permissions link in Zenbu.
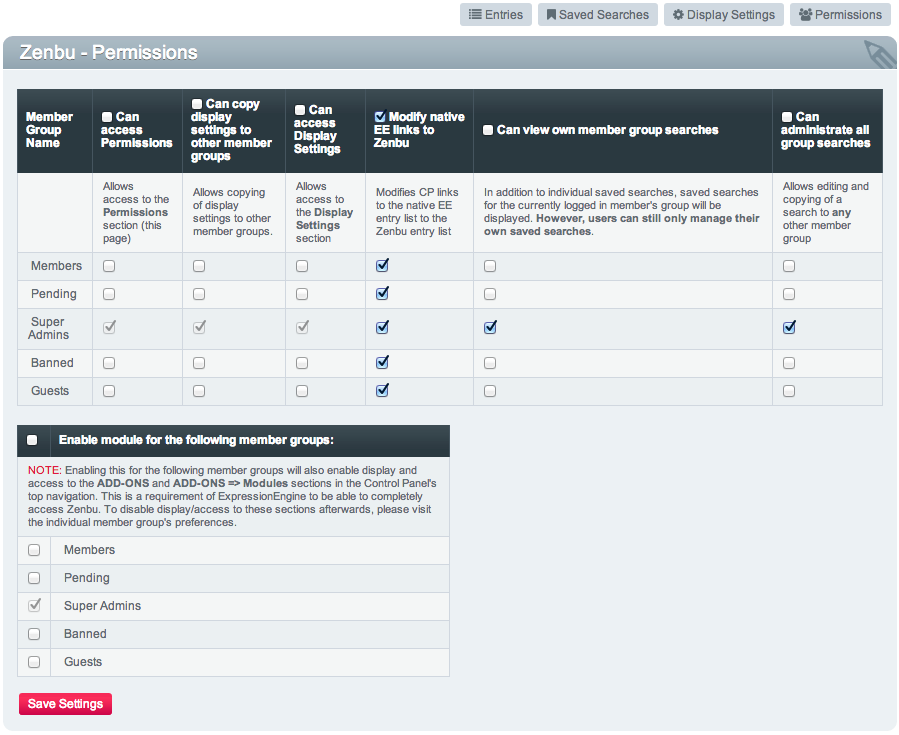
After installation, only Super Admins can access this panel, which can then open access to other member groups later.
A description of each option can be found in the screenshot above.